
With school starting in just one month (YIKES!) it’s time to start planning and preparing for the year ahead. Last year I wrote about how I was planning to organize student notebooks with divider tabs. That was a WONDERFUL addition to our notebooks! I loved having them for multiple reasons – it kept the books more organized, helped students find their page faster, told students EXACTLY what lessons they needed to have in their notebooks to get full credit for their notes, and made grading notebooks a breeze. This year, however, I will be switching to binders so I am planning to make some changes.
Why am I switching?
I have used binders in the past but switched to 3-subject notebooks years ago because the binders seemed too bulky. I have loved using the 3-subject notebooks because they worked perfectly for my needs. However, my school is switching to a new textbook series this year that doesn’t come with a workbook. In the past, I have typically assigned workbook pages as homework most nights. This year I will need to give worksheets as homework assignments since I won’t have workbooks, so I thought binders would be better given the increased number of handouts students will have this year.
How am I setting up the binders?
Each student will have a ½ inch binder with 2 dividers (to split the binder into 3 sections). The front section will be for notes, the second section will be for classwork, and the third will be for homework. My plan is to run off all of the homework assignments for a unit at the beginning of the unit this year and give them to students in a packet, to put in the homework section. The classwork section is just for looseleaf/graph paper for students to write out work on or classwork worksheets. The front notes section is where they will actually take their notes each day. Their notes will mainly be a combination of basic notes taken on looseleaf paper and fill-in guided notes that I have created. I am not a big fan of notes that require a lot of folding, cutting, and pasting.
Am I still doing the divider tabs that I loved so much last year?
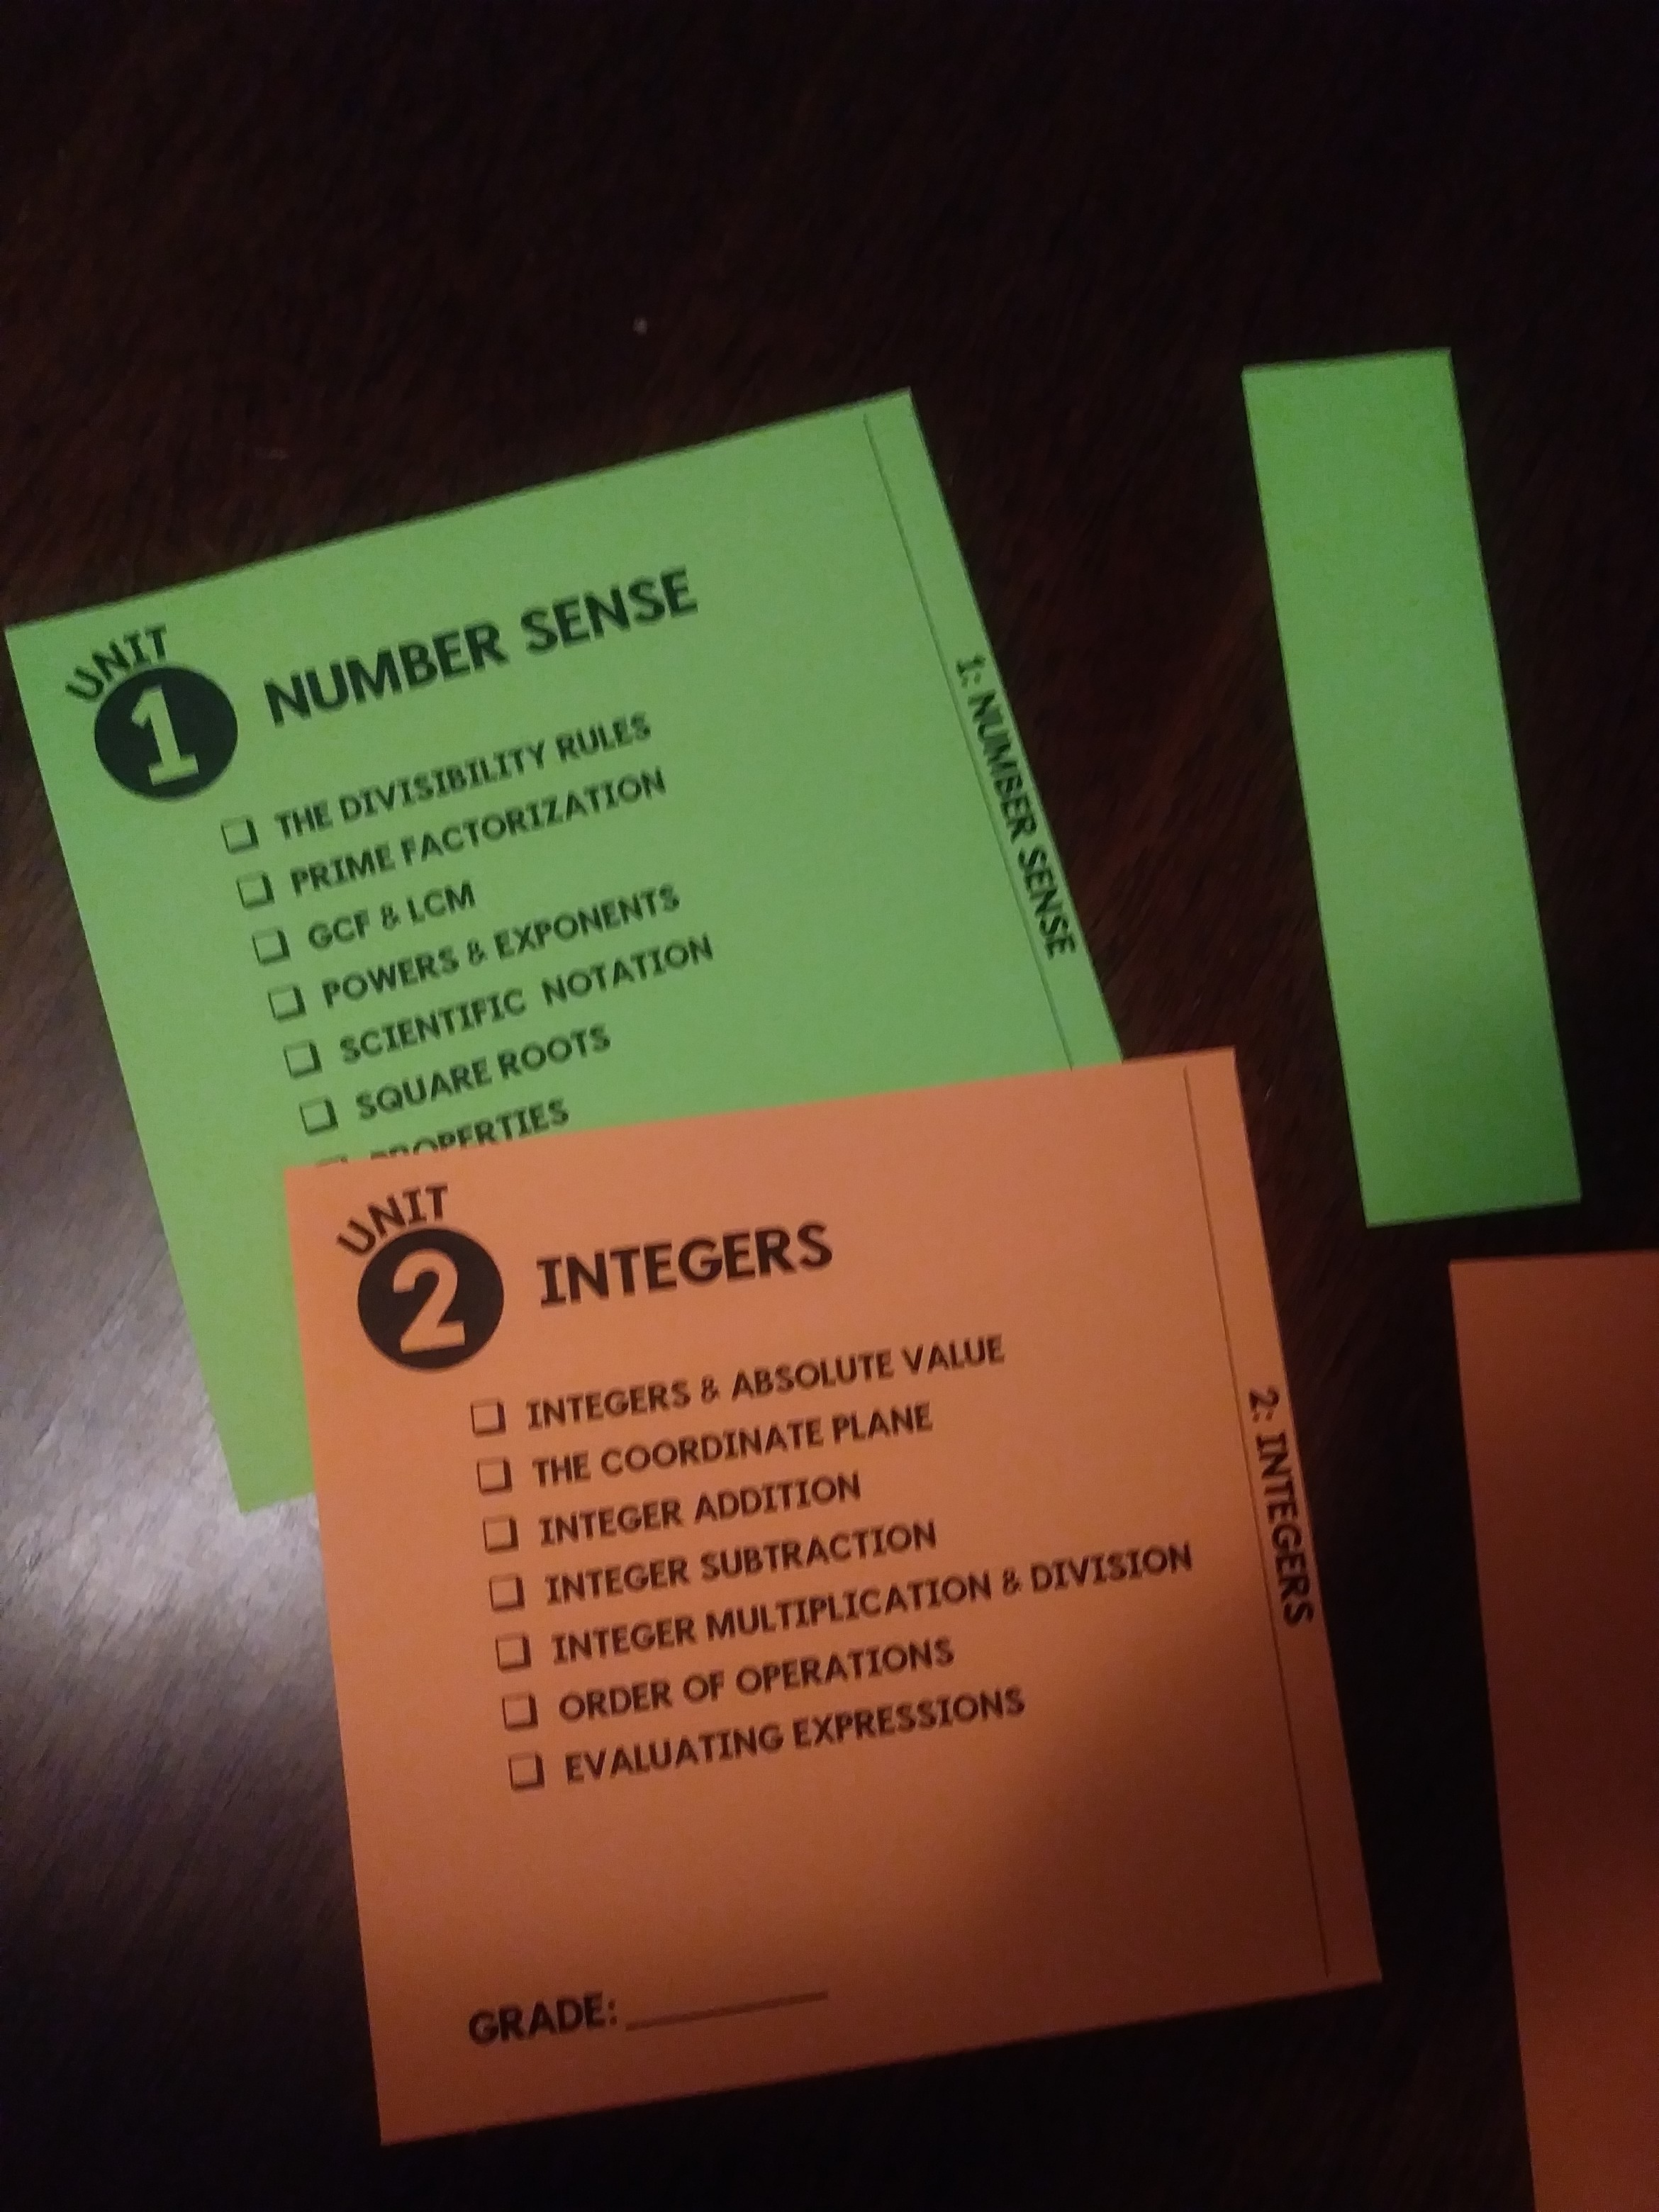
YES! But, I’m doing them differently with the binders this year. I figured there was no sense in having students glue the notebook dividers onto paper this year since you can put whatever paper you want into binders thanks to their 3 rings. So, I am in the process of remaking my dividers for binders. I can’t just use a regular piece of paper as a divider because it isn’t big enough to stick out the side as a tab, so I turned the paper sideways and cut it down to 9 inches wide to make my new binder dividers. It only spans across 2 of the rings in the binder, but that should be enough. Here are some pictures of my new divider tabs. I am alternating using the top 2 rings and the bottom 2 rings so that the tabs are staggered.


I think that these will work out well. I also like that there is absolutely NO cutting & gluing required for students. I will copy the dividers, cut off the excess from the side with a paper cutter (which will leave me with lots of little pieces of bookmark-sized scrap paper, which I will definitely use), and hole punch them. Then all the students need to do is stick them in their binders – easy peasy!
To keep the binders neat, my plan is to have students empty out their classwork & homework sections after each unit so that they do not accumulate too much junk. I am excited to see how these work out this year.
The divider tabs pictured are for my first and second units in 7th grade. If you are curious as to how I structure my year, you can check out my scope & sequences in this blog post. I will likely make a few changes to it this year, but overall I was pretty happy my sequencing last year. If you are looking for ideas & resources for these first couple of units, you may want to check out the following:
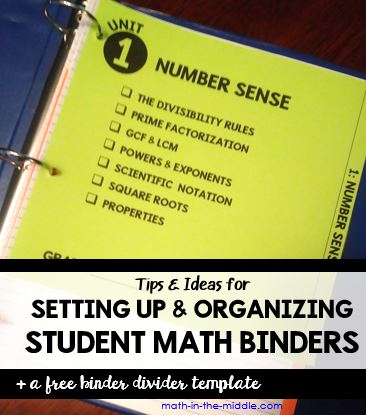
UNIT 1: Number Sense
Blog Posts:
– Improving Number Sense with the Divisibility Rules
– Teaching GCF & LCM Using the Cake Method
– Using the Cake Method to find the GCF & LCM of 3 Numbers
Resources:
– Number Theory Bundle (covers divisibility, prime factorization, gcf & lcm)
– Squares & Square Roots Paperless BINGO Game
UNIT 2: Integers
Blog Posts:
– Teaching Integer Addition
– Teaching Integer Subtraction
– Teaching Integer Multiplication & Division
Resources:
– Integer Bundle (includes a TON of resources on integer operations – worksheets, games, task cards, unit test – each can be purchased separately, as well)
– FREE Paperless Integer Addition BINGO Game
Would you like to make your own binder divider tabs? Click the picture below for a FREE editable PowerPoint template you can use. If you are using notebooks instead, you can find the free notebook divider tabs template I used last year in this post.
![]()
** PS: I just started a brand new Facebook page. I will be sharing ideas, lessons, freebies, resources and more so be sure to follow me there! **
Thanks for reading,
Christina

Pingback:But really, what goes on in your classroom? – Mrs. Karner's Class Blog
Hi! Did these work out for you? I am considering adopting the idea for next year.
Yes! These worked out wonderfully this year and I will definitely continue using them future years!
Thank you for your response! Love your blog! Very inspiring.
Do you use store bought dividers and the ones that you made (which I’m in love with) in the student binder? I know you stated that you have students section their binders into three sections but how does that look? Thanks!
Hi Jessica,
Yes – the students have 2 store-bought dividers in their binders in addition to the homemade ones. However, next year I will switch to just one store-bought divider to separate the notes from everything else. So, the front section of their binder is just notes and is split up with my homemade dividers to separate the notes for each unit. (If you open one of my student’s binder, the first thing you see is my homemade unit 1 divider, followed by their unit 1 notes; then unit 2, etc.) After all their notes is a store-bought divider. Then all of their “stuff” that isn’t notes (homework, worksheets, scrap paper they use, etc). After each unit I tell them to dump all of the non-notes from their binder so they don’t get too full. However, even with kids dumping everything other than notes after each unit, some of their binders are still busting at the seams, so I will switch to 1 inch instead of 1/2 inch binders next year. I hope that clarifies my setup for you!
I can tell you after using the dividers and binders for a year now, I absolutely LOVED them! My students as a whole were much more organized this year and they worked out really well for me. Another thing I did was when I graded the notes after each unit, if there was a student whose binder was a mess and out of order, I fixed it for them at that point to set them straight before the next unit. That is something I couldn’t do with notebooks, and it made big (positive) difference with those students!
Thanks,
Christina
Thank you so much for the clarification! I will definitely try your binder setup next school year. My school just purchased a math curriculum but I think I’m going to have to supplement it here and there; and your binder system will help tremendously with that. Thank you again for all of your helpful advice and resources (I purchased your math alphabet two years ago and I just realized you were the creator). Please keep the amazing resources and advice coming!
Aw, thank you so much!
Hi! I really like this strategy. Can you elaborate a little bit more on how you organized your self to grade the binders? What did you grade? Also, what did the students do with the stuff they took out of their binder at the end of each unit?
Hi Jennifer,
Grading the binders was pretty simple. On test days I had my students drop their binders off at my front table when they first came in the room. While they took the test I sat at the table and checked that they had notes for each of the lessons listed on the divider tab for that unit and that their notes included some type of explanation and completed example. On their divider I wrote a 0, 1, or 2 next to each lesson depending on whether they had the explanation and example, or just 1 of the two, or neither. At the bottom of the divder I wrote their total for that unit by adding up their points from each lesson. I then recorded it in my gradebook and that was pretty much it. It was a pretty quick and painless process.
For the most part students just threw out the old worksheets/homeworks after each unit. The notes were the only thing I cared that they held onto. Some students liked holding onto everything so those students had a bigger binder that they kept at home where they put all their old papers. That was totally optional, though, and I was perfectly fine with most of the students throwing out the old worksheets as long as they kept their notes.
I hope that helps!
Thanks,
Christina
Hi Christina!
I was wondering if you let the students take their binders home with them to do homework, then return them the next day or if you had a spot for the students to leave them in the classroom? If you have them take their binders home, how would you handle the students who would always forget to bring them back to school?
Thank you!
Lindsey
Hi Lindsey,
I do allow students to take their binders home each day. To be honest, I have never had issues with students forgetting to bring them back the next day. They keep their homework in their binders so they are used to always bringing them back and forth.
– Christina